“Be yourself; everyone else is already taken.” ....Oscar Wilde
Showing posts with label Eggs. Show all posts

Friday, 14 July 2017

The Chicken or Egg...PPF

So which came first...the chicken or the egg?
I've been having a little more fun with my art this week.
Although I haven't had much time, I did manage to try out something new.
I started with a water blob on my paper...then blended a few colours and finally I tried blowing the paint outwards with a straw. It was more difficult than I thought and I was quite out of puff when I'd finished.
When I looked at the results I saw a little chicklet!
(Maybe with the worst bad hair day or been caught in an electrical storm)
I know we're getting 'cluckling mad' around here.
I promise I'll try to bring you nothing referring to chickens/hens next week!

Talking of being mad... we had a rainy few days and worryingly hubby was online.
I'm always nervous when he spends time browsing the internet because I never know what's coming next. Quite literally... and here's what arrived in a huge truck yesterday! 
To give you some idea of their size I am 5'.4" and they are shoulder height to me! 
My son thought that the driver had possibly had a wee tipple which concerned him, being a driver, but he didn't know that the barrels had previously contained whisky! 
Our garage now smells like a distillery!
I'll be revealing more details as this next crazy antic gets underway.
Retirement has a lot to answer for!

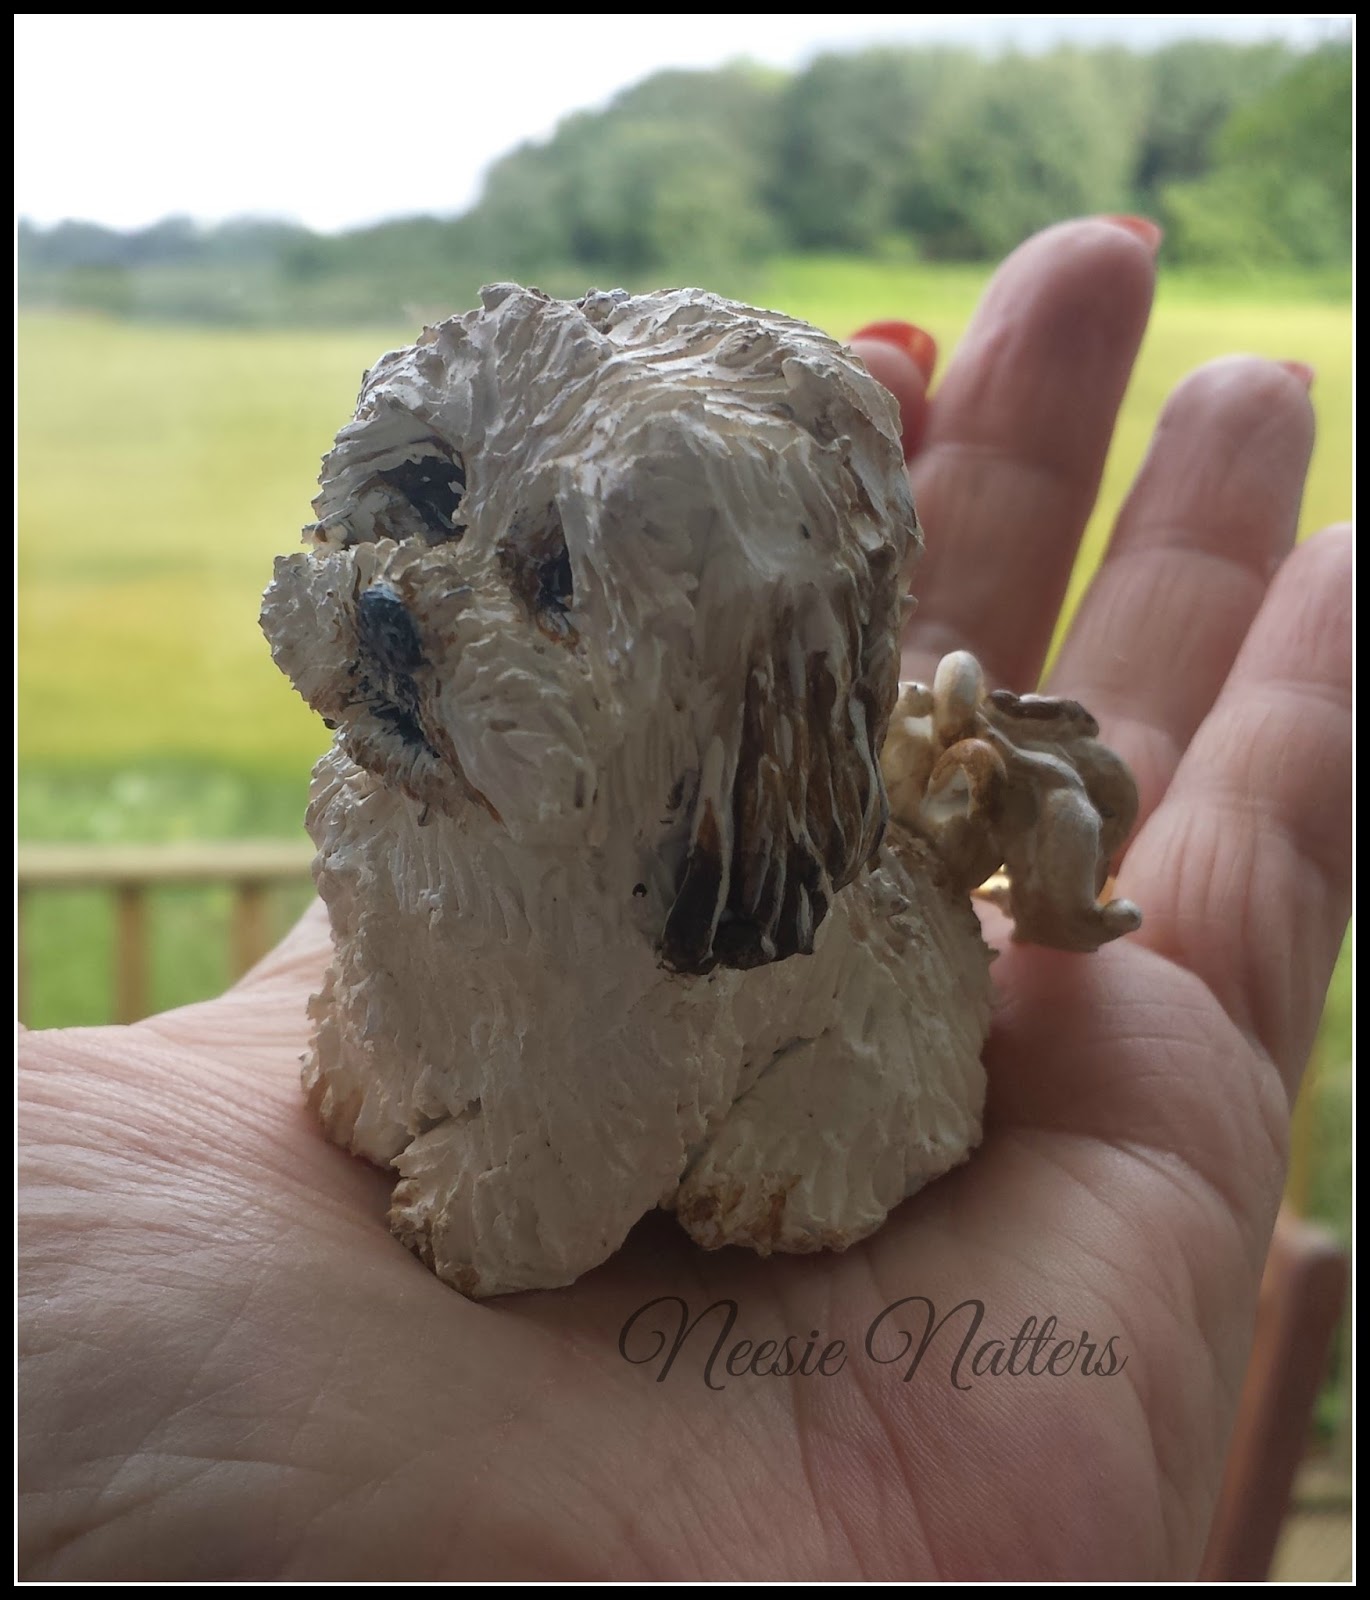
And finally because this has to be a quick post today, as my daughter arrives for the weekend in a few hours. I thought that I'd show just how cute my little wee Muffin figurine is that +Nic McLean created for me. Some have asked what size it is...so here's an indication.
If you'd like to see more of this figurine then click here or visit Nic here
❤ I adore it
Have a great weekend peeps...whatever you have planned. 
Have fun!
I'm linking into the Paint Party Friday as usual.
Please pop along if you'd like to see lots more art from all over the globe.
Happy Friday Everyone 
😊


Friday, 14 April 2017

Easter Bunny...PPF

Happy Easter Everyone
As it's the long Easter weekend and there are Easter egg's everywhere, I thought I'd join in too.
Mainly, because in keeping with the egg theme...I'm like a headless chicken today!
(Rather tenuous link I know - sorry)
It's the sort of day where I want to be like an octopus and have eight arms, so that I can do all that's on my extensive 'to-do' list. 
I would desperately love to sit here and carry on painting my Easter Bunny, but I've got to go outside...mainly because the day is reasonably good and I don't want to miss it.
I will have to have a painting session later...as my reward.
I know this looks a little strange in the under-painting stage.
It's like catching a painting in just it's underwear! 
As you know each time I post an unfinished work I moan, because I desperately want to only post finished pieces of artwork.
This week it's all been about Muffin once again.
We're still battling with her lack of food intake and weight loss.
We were at the vet's again this morning and they've decided to up her steroids.
Hopefully, she'll be eating everything in sight soon and be strong enough to 'Toss the Caber' or dance the 'Highland Fling'.

Well I must dash...but before I go and link up with Paint Party Friday, 
I will wish you a Happy Easter.
(or a happy long weekend if you don't celebrate the Easter holiday)

Oh yes, and one more thing...April the Giraffe still hasn't had her baby yet, so if you would like to enter the freebie 'Giveaway Draw'... be quick because as soon as the baby arrives the draw will close.
Click here and put 'yes please' in the comment below the post.
I've got nearly 200 entrants so far, which is fantastic.
Good luck if you've already entered.
Muffin will be performing the name picking (hopefully) on video as she did so well last time.
Thanks for visiting today.
Bye for now 

Saturday, 11 February 2012

Toad in the hole....

I've just had a chuckle to myself about the title of today's post because I wonder how this might go down in translation to different parts of the world. I've never heard this particular dish called anything else but 'toad-in-the-hole but if you do then please enlighten me....
So for those of you that might never have come across 'toad-in-the-hole let me explain. Absolutely no toads have come anywhere near my kitchen to participate in the making of this dish (thankfully because I'd exit from the nearest door).
Well if toads aren't in the dish what is you might ask? Stay with me if you already know...
The 'toads' are in fact sausages which are cooked in the middle of a batter commonly known as Yorkshire puddings...oh here we go again...here are a few fact about  Yorkshire Puds if you would like to know a little more.
I've been hearing that there's an amazing amount of snow in the Northern Hemisphere and that got me thinking when the temperature dropped to a lowly 20 to 25'C that this dish would be perfect.
'Toad-in-the-hole' is a great warming dish that's always a favourite in our house.

This picture was taken just as I took them out of the oven. I don't usually make individual puds but I thought they would be great and (blowing my own Trumpet ~ as advised I should do when my cooking comes out well) they were soooooooooo good!
You might even be able to smell them if you come close enough to the screen.....ahhh.....
My OH and son weren't too happy at having a photo shot whilst they were salivating. But it was worth the wait.
There are little secrets to perform in order for the puds to rise this high...which because I know you, I'll let you in on.... : D
Look at the size of this baby!

 They came out of the 11cm mini spring form pan so easily too. 
Then keeping the hungry wolves at bay I managed to get this photo, much to the protests from the boys.
And there you have it .....'Toad-in-the-hole' with onion gravy and peas.

So simple but oh so satisfying ~ don't believe me just give it a go...
Its great with mashed potatoes too.

'Toad-in-the-hole' Recipe ~ Serves 4 

Ingredients:
Canola Oil (or Sunflower)
6 to 8 large good quality sausages (remember the better the quality the superior end taste)
4 sprigs of fresh rosemary
2 large red onions ~ peeled and sliced
2 cloves of garlic ~ peeled and finely sliced
2 knobs of butter 
6 tablespoon of balsamic vinegar
1 level tablespoon of good-quality vegetable stock powder or 1 vegetable stock cube

Batter Ingredients:
285ml / ½ pint of milk
115g / 4oz plain flour
a pinch of salt
3 eggs

* Secret No.1 
As my Grandmother and MIL have always taught it is thought to be better to make the batter in advance and put to one side. I tend to follow their advice but when time is of the essence I have mixed the batter and used it straight away. I have to confess I didn't really notice the difference but I shall remain to take their advice time permitting of course.

Method for making Batter: 
1. Using a mixing bowl place in eggs and add the pinch of salt, flour and milk. 
2. Mix together until all the lumps disappear and mixture is a smooth batter. 
3. Put to one side ~ covered until you are ready to cook the puds.
4. Before you add the mixture give another quick mix to incorporate air to help make the puddings rise and be light and fluffy.

* Secret No. 2. The baking tin should be quite thin so that the oil will get to smoking hot. This is a very important part.

Method for making Puds
1.  Put 1cm (just under ½ inch of oil into a baking tin or individual tins.
2. Place the tin in the middle shelf of oven at its highest setting ~ 240-250° C/475° F / Gas 9.
3. Place a tray underneath to save any oil that may overflow. I hate to clean my oven so this is an important step for me.
4. When the oil is very hot carefully add the sausages. I've cooked them this way but also seperately on a rack ~ both work well so the choice of how you want to cook your sausages is entirely up to you.
5. Keep an eye on them and allow to colour until lightly golden.
6. Carefully take the tins out of the oven or as I sometimes do just gently pull the shelf out. Making sure that it is stable ~ don't pull out too far. This is the tricky bit. Hot Fat!!! so be very careful.
7. After remixing the batter mixture to freshen it up and allow as much air as possible in, pour carefully over the sausages. If you cooked your sausages seperately make sure you add then into the oil tray for a few minutes before pouring in the batter mix. As you pour in the batter mix it may well spit and bubble...stand back a little.
8. Add a couple of sprigs rosemary into the batter. The smell is unbelievable.
9. Place shelf back in the middle and close the door.
* Secret No. 3 AND MOST IMPORTANT ~ Leave in the oven for 20 minutes DO NOT OPEN THE DOOR!
This is easier if you have a glass oven door because you can see all the action. If you don't have a glass door, have faith and wait. Trust me its worth it.

Method for making Onion Gravy ~ this can be done in advance and freezes very well. 
1. Peel and slice onion. 
2. Gently fry in a pan with the butter and garlic until the onion is translucent. 
3. Add a little rosemary if you wish. 
4. Add balsamic vinegar and allow to cook down by half. 
5. Add a stock cube or powder. (yes I know)
6. Add a little water.
7. Allow to simmer. 
This is really such a great gravy and goes with numerous dishes. Hence I always have some in a container in the freezer. 

I originally started this recipe using Jamie Olivers recipe. God bless you Jamie.
If you try it I hope you enjoy it as much as we do in this house. :D
Toad in The Hole

Friday, 4 March 2011

Chocolate and Vanilla Marble Cake...

This was a first for me today. Chocolate and Vanilla Marble Cake, but I have to confess its going to be a regular feature in my cake tin.
It's basically Madeira cake recipe that is separated into two bowls, good quality cocoa powder is folded into one and then the two mixtures are swirled gently together. It will keep for a couple of days in an airtight container or box, but can be frozen. Serve it plain or dusted with icing sugar; or if you want to be really indulgent....drizzle some hot chocolate sauce over the top.

You have to be careful when drawing the swirls that you don't overdo it because then you would lose the 'marble' effect.
I think it looks very impressive but its so easy

Yum yum...I better get out on my bike now to burn this off.
Chocolate and Vanilla Marble Cake
225g (8oz) Butter, softened
225g (8oz) Caster Sugar
4 Eggs
2 tsp Vanilla Extract
225g (8oz) Plain Flour
2 tsp Baking Powder
50ml (1 3/4 fl oz) Milk
Scant 50g (2oz) Cocoa Powder, sifted
20cm (8in0 diameter spring-form/loose-bottomed tin
Preheat the oven to 180C (350F), Gas mark 4.
Butter and flour the sides of the cake tin and line the base with greaseproof paper.
Cream the butter in a large bowl or in an electric food mixer until soft.
Add the sugar and beat until the mixture is light and fluffy.
Whisk the eggs and vanilla extract together in a small bowl. Gradually add the eggs to the butter mixture, beating all the time. Sift in the flour and baking powder and fold in gently to mix, then add the milk and mix gently to combine.
Tip half of the cake mixture into another large bowl and, into this bowl, fold in the sifted cocoa powder.
Place the cake mixtures into the prepared tin by alternating spoonfuls of the vanilla batter with the chocolate batter, then with a skewer or similar implement, gently draw swirls through the cake mixture to 'marblise' it. Don't over mix.
Bake in the oven for 45 minutes or until a skewer inserted into the middle comes out clean.
Turn the cake out onto a wire rack and allow to cool.
This recipe came from Rachel Allen's 'Bake' and I can highly recommend you try it.
See more of Rachel's recipes http://www.rachelallen.co.uk/

Wednesday, 3 November 2010

Who is it?....(Part 6 - The End) The Peck Family

Well its official....we're empty Nester's. I know sad but true.
I suspected the chicks flew the nest a day or so ago, but today when I went up close and personal there wasn't a sign. Not even a note to say thank you or we'll be back!
I did happen to hear a few taps on my window again this morning, so hopefully we're not going to have the whole family come a calling.....fingers crossed it was just Gregory.

Monday, 4 October 2010

Victoria Sandwich - a decent portion

As you know the fashion for delicate little fairy cakes has been around for a while now and I personally never grow tired of seeing all the variations of idea's and creations. I think they're just perfectly sized indulgences, so the guilt doesn't really get out of hand....but unfortunately they just don't wash in our house.
They just don't fit the bill.....namely my son!

So we always have to have the full portion....a Victoria Sponge. No half measure here

Very often when I mention to friends that I've made one they look at me puzzled or admit its been years since they made one....

So lets go retro

Makes two 20cm cakes
200g butter, plus extra for greasing
200g caster sugar
1/2 tsp vanilla extract
200g self-raising flour
4 medium eggs
Pre-heat the oven to 190C/375F/Gas Mark 5.
Grease and flour two 20cm sandwich tins.
Place the butter, caster sugar and vanilla essence into a bowl or blender and mix well to a creamy consistency.
Then slowly mix the eggs into the bowl, adding them one by one.
Fold in the flour. When mixed, pour into the tins and bake for 20-25mins until well risen and golden brown. The cakes should spring back when pressed on top with a finger. Turn out and leave to cool on wire racks.

You can then fill with jam, fresh cream, or both, or just butter cream, or whatever you fancy. Just a sprinkle of icing sugar over the top completes. Then sit back and watch it disappear
(well it does in our house)

In keeping with the retro theme I have to admit I did have a little heavenly help to make the sponge.

And here they are...

These little chaps have been in my family since about 1979 (or thereabouts) They were a present from my Aunt. As you can see from the odd chip they've been around....well quite literally....they've been to 5 countries no less.


Related Posts Plugin for WordPress, Blogger...